Loading...
Loading...
Loading...
Loading...
Loading...
Loading...
Loading...
Loading...
Loading...
Loading...
Loading...
Loading...
Loading...
Loading...
Loading...
Loading...
Loading...
Loading...
Loading...
Loading...
Loading...
Loading...
Loading...
Loading...
Loading...
Loading...
Loading...
Loading...
Loading...
Loading...
Loading...
Loading...
Loading...
Rev. 1 Jul 2025
This guide presents the core primary market tasks as you would complete them in the Asset Manager portal. It also provides the corresponding endpoints that would be used to perform the same tasks using the Integration API.
Step 1: Get your IP address.
We need your IP address to provide secure access to the Corastone portal. One way to get your IP address is to use https://whatismyipaddress.com/.
The result is something like this:
IPv4: 11.1.11.111
Step 2: Send us your IP address and preferred email address.
Send your IP address and preferred email address to [email protected].
Step 3: Wait for confirmation that your access has been activated.
Check your preferred email account for an invitation to log in.
Step 4: Click the Accept Invite button in the invitation email.
You'll see a screen for setting up your password.
Step 5: Set your password.
You now have access to the Asset Manager portal.
Step 6: Bookmark the link for the Asset Manager portal.
The next time you need to access the portal:
Click the bookmark you created in Step 6.
Enter your email and password.
Click Login.
How to set up your fund on the platform
The process of adding and launching a fund requires completing the following sections:
Legal Entity Information: Details about the business organization created in association with the fund.
Fund Information: Basic information about the fund's purpose, goals, and registration.
Offering Terms: Specifics about the securities being offered.
Operations Information: Details required for supporting transactions, such as bank account numbers.
To start the process of adding a fund to the platform:
Go to the Fund List page.
Click Add Fund.
The banner lists the pages you will need to complete.
To add a fund to the platform, you'll need to implement the following endpoint:
The payload for this endpoint is reflected by the fields in the following portal pages:
Use the User Access List page to manage fund access for other members of your organization.
You can:
grant access to the fund
select permissions for each page
remove access to the fund

Offering terms vary based on fund type:
The following table lists the remediation reasons available.
EC001
tax document deficiencies
EC002
investor information and AML KYC issues
EC003
sub doc issues
EC004
account issues
EC005
transaction data issues
EC006
other issues
The Asset Manager portal enables you to manage correlation IDs for the following items:
securities
share classes
lots (assets)
investors
accounts
Associating correlation IDs with the generated Corastone IDs means you don't need to manage Corastone IDs for these items.

Using the Fund's Primary Sales Page
The Primary Sales page for a fund is the place for managing subscriptions to that fund. The tabs that display depend on whether capital calls are enabled. The subsections that follow explain how the subscription process moves a request through the tabs.
Use the All Transactions tab to review all subscriptions for a fund, except for Issued subscriptions.
To see the status of all transactions for a fund, you'll need to implement the following endpoints:
Get Asset Details (filtered by security ID)
Get Security Details (filtered by security ID)
Get Account Details (filtered by account ID)
To facilitate communication, you can download the contents of the Primary Sales/All Transactions tab to an Excel file:
Click Generate Report.
Click the Download Report link.
To estimate the effort to integrate via the API, consider the following information:
Total Endpoints: ~22
Total Responses: ~88
Total Error Codes: ~180
If you send a subscription for remediation, it moves to the Pending Remediation tab.
It remains here until the investing organization makes the necessary changes and resubmits. It then moves back to the Subscriptions Received tab.
For subscriptions that are pending remediation, you'll need to implement the following endpoints:
Get Asset Details (filter to return assets under the security ID with Pending Remediation status)
Get Asset Details (filter by asset ID)
Permissions are set per page:
No Access
View
Edit
Approve
All pages are set to View by default.
To make changes:
If the Permissions screen is not already displayed, go to the User Access List for the fund.
Select the entry for the user whose permissions need to change.
Select the preferred access for each page.
Click Save.
Subscriptions that are ready to be issued move to the Pending Issuance tab.
For subscriptions pending issuance, you'll need to implement the following endpoints:
(filter to return assets under the security ID with Pending Issuance status)
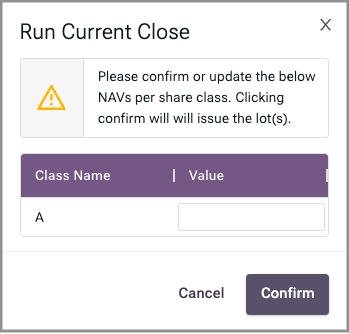
To issue securities for all subscriptions:
Click Run Current Close to issue securities.
Confirm or correct the NAV for each share class.
Click Confirm.
The transaction moves out of the Primary Sales pages at this point. To review subscriptions for issued securities, click All Transactions in the menu on the left.
For issuing securities, you'll need to implement the following endpoint:
To cancel a settled subscription:
Click View Details.
Scroll to the bottom.
Click Cancel Lot.
Click Confirm.
For canceling a subscription, you'll need to implement the following endpoint:
Your selling firms facilitate investor subscriptions to your fund.
You approve or reject investors during the .
To search for the investor entry you need to work with:
Go to the Investor List page.
Use any of the columns to filter the list of investors. (See How to Use the Filters for details.)
Click the column name to sort the entries alphabetically, if needed.
You can use any columns in the Investor List page to filter the user entries displayed:
For ID or Name, enter characters to match the content you are looking for. For example, enter A in the Name filter to find all investor names containing the letter A. Note: Wildcards are not supported.
For Status as of Date, click the calendar icon to select a date.
For all other columns, click the field and select the values to include. For example, to include only entries for approved investors, click the Status filter and select only Approved from the list.
The endpoint offers a subset of the query filters offered by the portal.
Subscriptions that have been accepted and require upfront payment are displayed in the Pending Settlement tab.
Once payment has been received:
Select the subscriptions.
Click Settle.
For subscriptions that are pending settlement, you'll need to implement the following endpoints:
(filter to return assets under the security ID with Pending Settlement status)
(filtered by asset ID)


The Legal Entity Information section has the following subsections:
You must complete the General Information section before the Address section will display.
Use the following table to complete the information in this section:
General Information
Name
Full name of the legal entity associated with a security.
Description
Additional text about the legal entity. Use this field to provide context when the Legal Entity Type field is set to Other.
Incorporation Information
Country
Country of incorporation. Select from United States, Canada, Cayman Islands, and Luxembourg.
State
State of incorporation.
Tax ID
Identifier assigned to the legal entity for tax purposes.
Legal Entity Type
Select from Limited Partnership (LP), Limited Liability Company (LLC), C Corporation, S Corporation, Limited (Ltd.), Business or Statutory Trust.
Incorporation Date
Date of incorporation.
Click Save.
General legal entity information is part of the Launch New Offering payload.
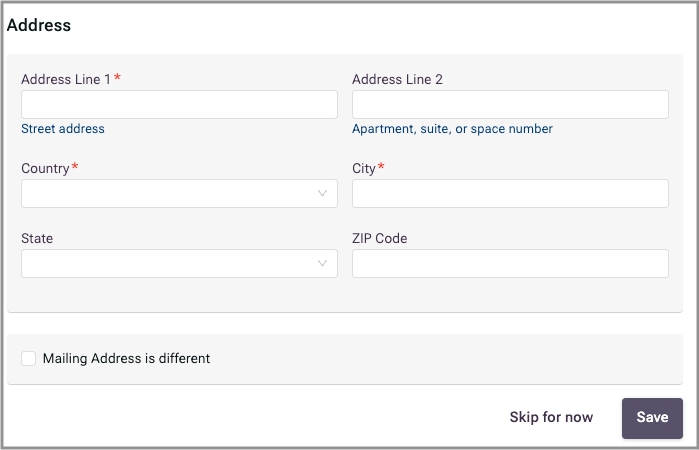
Use the following table to complete the information in this section:
Address Line 1, Address Line 2...
Physical address of the legal entity.
Mailing address is different
Select to display fields for the mailing address of the legal entity if different from physical address.
Click Save.
Legal entity address information is part of the Launch New Offering payload.
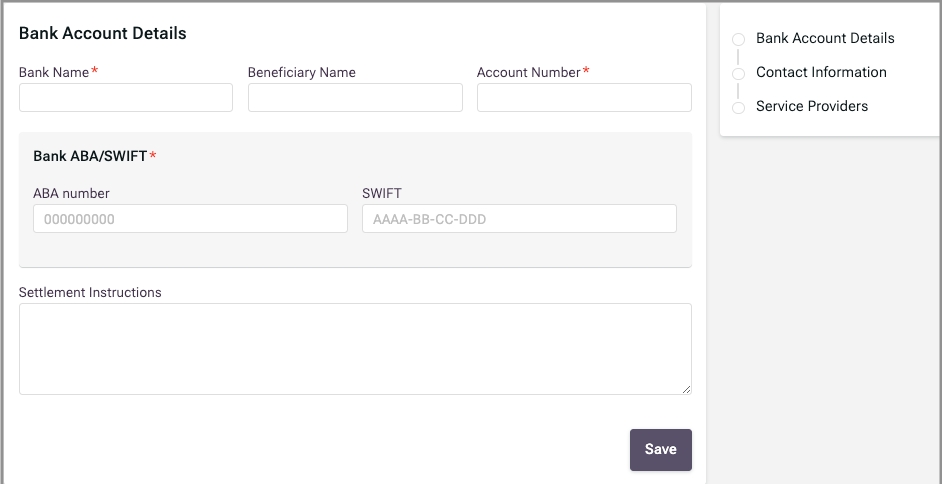
The Operations Information section has the following subsections:
Use the following table to complete this section:
Bank Name
Name of the financial institution that will be involved in payments.
Beneficiary Name
Name of the fund beneficiary.
ABA Number
Bank routing number.
SWIFT
Code identifying the bank if it is located outside the US.
Account Number
Identifying number for the bank account to be used.
Settlement Instructions
Any instructions that should be followed any time a trade is made.
Click Save.
Bank Account Details are part of the Launch New Offering payload.
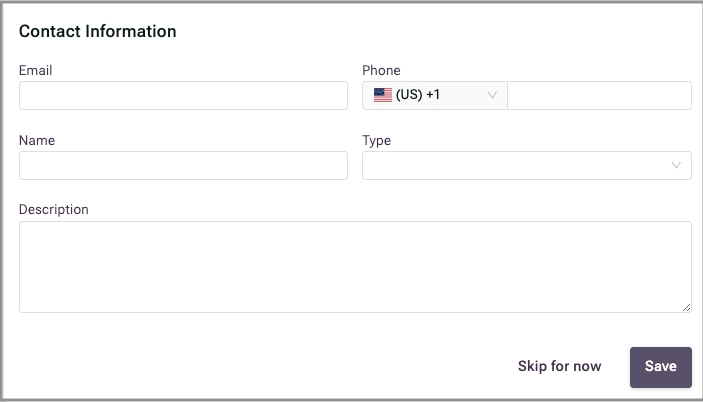
Use the following table to complete this section:
Email address for fund main contact/GP.
Phone Number
Phone number for fund main contact/GP.
Name
Name of fund main contact/GP.
Type
Select from Primary, Legal, Tax, Personal, or Other.
Description
(Optional) Additional information about the contact.
Click Save.
Contact Information is part of the Launch New Offering payload.
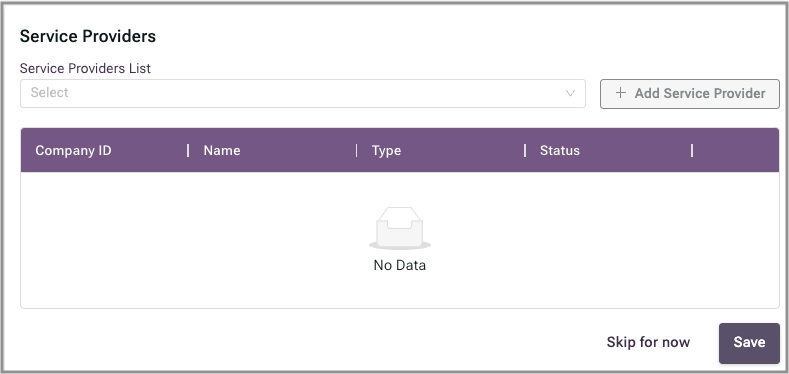
Service providers are associated organizations, such as fund administrators.
Click in the Service Providers List.
Select a service provider.
Click Add Service Provider.
Click Save.
Service Providers are part of the Launch New Offering payload.
Subscriptions that are canceled after settlement move to the Canceled tab.
For subscriptions that have been canceled, you'll need to implement the following endpoint:
Get Asset Details (filter to return assets under the security ID with Canceled status)
Canceled lots remain in the Canceled tab until you dispose them.
Click the lot ID.
Scroll to the bottom of the Lot Detail screen.
Click Dispose Lot.
Click Confirm.
If an investor decides not to continue with the subscription, the entry moves to the Withdrawn tab.
To complete next steps for this subscription:
Click View Details.
Scroll to the bottom.
Click Reject Withdrawal or Accept Withdrawal.
For subscriptions that have been withdrawn (recalled) by the investor, you'll need to implement the following endpoint:
Get Asset Details (filter to return assets under the security ID with Withdrawn status)
For Managing Subscriptions
The selling firms your firm does business with are configured in the by someone with the Tech Support role. Once a selling firm is configured, you can grant it access to a fund.
Select the fund from the Funds List.
Click Selling Firms.
Click Add Selling Firm.
Select the Company Name from the dropdown.
Use the Reliance Letter dropdown to indicate whether the reliance letter has been provided.
Set the Status field to Approved or Not Approved for each class name.
Click Confirm.
To add selling firms, you'll need to implement the following endpoint:
Select the fund from the Funds List.
Click Selling Firms.
Click the edit icon for the firm whose information you want to edit.
Make your changes.
Click Confirm.
To change selling firm information, you'll need to implement the following endpoint:
Select the fund from the Funds List.
Click Selling Firms.
Click the delete icon for the firm whose fund access you want to remove.
To remove a selling firm's access to a fund, you'll need to implement the following endpoint:
Manage lot correlation IDs from the Lot Details page.
To add a lot correlation ID:
Click Other Lot IDs List in the Lot Details page.
Click Add Internal Identifier.
Enter the internal unique ID to assign.
If you want to make this ID visible with the firms you do business with, select Broadcast to other counterparties.
Click Confirm.
To retrieve and add lot correlation IDs, you'll need to implement the following endpoints:
Searching for a lot correlation ID depends on whether the lot has been issued:
For lots that have not been issued, use the All Transactions tab in the Primary Sales page.
For lots that have been issued, use the All Transactions page.
Make sure the Other Lot IDs field is displayed.
Enter the lot correlation ID in the Other Lot IDs field.
The list filters as you type.
To delete a lot correlation ID:
Click Other Lot IDs List in the Lot Details page.
Click the delete icon next to the ID to be deleted.
Click Confirm.
To delete a lot correlation ID, you'll need to implement the following endpoints:
Manage internal security IDs from the Offering Settings page or the Primary Sales page.
To add a security correlation ID:
Click Other Security IDs List.
Click Add Internal Identifier.
Enter the internal unique ID to assign.
If you want to make this ID visible with the firms you do business with, select Broadcast to other counterparties.
Click Confirm.
To retrieve and add security correlation IDs, you'll need to implement the following endpoints:
To delete a security correlation ID:
Click Other Security IDs List.
Click the delete icon next to the ID to be deleted.
Click Confirm.
To delete a security correlation ID, you'll need to implement the following endpoints:
Manage account correlation IDs from the Account Profile page.
To add an account correlation ID:
Click Other Account IDs List.
Click Add Internal Identifier.
Enter the internal unique ID to assign.
If you want to make this ID visible with the firms you do business with, select Broadcast to other counterparties.
Click Confirm.
To retrieve and add account correlation IDs, you'll need to implement the following endpoints:
Searching for an account correlation ID depends on whether the corresponding lot has been issued:
For lots that have not been issued, use the All Transactions tab in the Primary Sales page.
For lots that have been issued, use the All Transactions page.
Make sure the Other Account IDs field is displayed.
Enter the account correlation ID in the Other Account IDs field.
The list filters as you type.
To delete an account correlation ID:
Click Other Account IDs List.
Click the delete icon next to the ID to be deleted.
Click Confirm.
To delete an account correlation ID, you'll need to implement the following endpoints:


When an investor requests a subscription, the associated information displays in the Subscriptions Received tab.
To review the subscription details:
Click the link under Lot ID to review the subscription request and perform next steps.
If the investor status is Pending, click the Investor ID link.
Click Approve or Reject.
Return to the Lot Details screen.
Use the buttons at the bottom of the screen to complete next steps (Accept, Reject, or Send for Remediation).
For incoming subscriptions, you'll need to implement the following endpoints:
Get Asset Details (filtered by security ID)
Get Security Details (filtered by security ID)
(filtered by account ID)
To accept the subscription:
Click Accept.
Click Confirm.
For accepting subscriptions, you'll need to implement the following endpoint:
To reject a subscription:
Click Reject.
Enter the reason for rejecting the subscription.
Click Confirm.
For rejecting subscriptions, you'll need to implement the following endpoint:
To request remediation:
Click Send for Remediation.
Click the Reason field to display a list.
Select a reason that applies.
(Optional) Click the Document list to select the document requiring changes.
If you selected a document, you can specify a page number.
Add comments to elaborate on the selected reason.
If there are multiple reasons, click Add Another Reason and repeat steps 2 and 3.
Click Confirm.
Note: Once assets are remediated, they return to the "incoming subscription" list.
To request remediation, you'll need to implement the following endpoint:
Request Digital Asset Remediation (Note: Once assets are remediated, they return to the "incoming subscription" list.)
To give a team member access to a fund:
In the Funds list, click the fund name.
Click User Access List in the side panel.
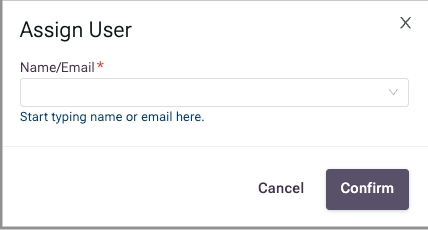
Click Assign User.
Enter the name or email of the user.
Select the matching record from the dropdown.
Click Confirm.
as needed.
Click Save.
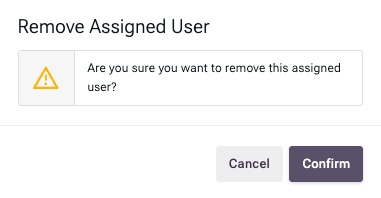
In the Funds list, click the fund name.
Click User Access List in the side panel.
Click the delete icon on the right side of the entry for the user.
Click Confirm.
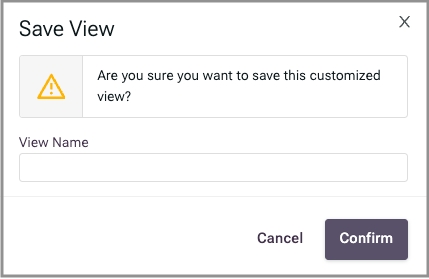
Several pages include the ability to customize views by selecting which columns display in the tables.
To customize your view:
Click Customized View.
In the displayed list, clear the columns you want to hide.
Select the columns you want to display.
Click Save View.
Enter a name for the view.
Click Confirm.
Your new view is saved to the list of views. The next time you want to use this view, just select it from the list.
Click Hide Customized View to hide the list of columns.


The Summary page displays the information you have defined for the offering.
When ready, click Launch Fund to make it available to investors.
The next step required for making the fund available for investing is to select the investing organizations that will be able to sell the fund to their clients. See Managing Selling Firms.
Launching the fund is included in the Launch New Offering payload.
To delete a fund before launching, click Delete Fund. Once launched, you cannot delete a fund from the platform.
The API does not offer a way to delete a fund. Before launch, there is nothing to delete from the platform. After launch, deleting a fund is not an option on the platform.
Use the Fund List to search for a security correlation ID.
In the Other Security IDs field, enter the correlation ID you are searching for. The list filters as you type.
For Limited Partnership (LP) Funds, Offering Terms has the following subsections:
Use the following table to complete this section:
Click Save.
Security Settings are part of the payload.
Use the following table to complete this section:
Click Save.
Minimum Investment values are part of the payload.
The Fee Information section covers fees for:
management
investor servicing
any other fees that are not performance based
Fees are grouped by named templates. Each template defines one or more named fees.
Click Add Template.
Enter a template name that identifies this group of fee definitions. For example, you might enter "Standard" or "Baseline."
Click Add a new fee.
Click in the Fee Name field.
Either select from the pre-defined fee names or enter a custom name for the fee template. For example, you can select Management Fees from the pre-defined list or enter something like "Premium Service Fees."
If you do not want to define tiers for this fee, skip to step 10.
Enter Min and Max amounts for the tier.
Click Add new tier.
Repeat steps 7 and 8 until all tiers are entered.
Click Confirm.
Use the following table to complete each entry in the fee table:
If there are multiple fees to list for this tier, click Add a new entry.
Select the next tier, if any.
Repeat steps 11-13. Click Save when all entries are entered for all tiers.
To add another fee template, return to step 1.
Fee Information is part of the payload.
Use the following table to define settings for all performance fees associated with this offering:
Use the following table to define each performance fee:
Click Add a new row to define another fee.
Click Save.
Performance Fees are part of the payload.
Use the following table to complete this section:
Click Save.
Sale Information is part of the payload.
Manage internal share class IDs from the Offering Settings page:
To add a share class correlation ID:
Click the link under Other Share Class Ids.
Click Add Internal Identifier.
Enter the internal unique ID to assign.
If you want to make this ID visible with the firms you do business with, select Broadcast to other counterparties.
Click Confirm.
To retrieve and add share class correlation IDs, you'll need to implement the following endpoints:
To delete a share class correlation ID:
Click the link under Other Share Class Ids.
Click the delete icon next to the ID to be deleted.
Click Confirm.
To delete a share class correlation ID, you'll need to implement the following endpoints:
Manage internal investor IDs from the Investor Profile page.
To add an investor correlation ID:
Click Other Investor IDs List.
Click Add Internal Identifier.
Enter the internal unique ID to assign.
If you want to make this ID visible with the firms you do business with, select Broadcast to other counterparties.
Click Confirm.
To retrieve and add investor correlation IDs, you'll need to implement the following endpoints:
Use the Investor List to search for an investor correlation ID.
Make sure the Other Investor IDs field is displayed.
Enter the investor correlation ID in the Other Investor IDs field.
The list filters as you type.
To delete an investor correlation ID:
Click Other Investor IDs List.
Click the delete icon next to the ID to be deleted.
Click Confirm.
To delete an investor correlation ID, you'll need to implement the following endpoints:


Name
Legal name of the security being offered.
Short Name
Alternate name that the security is known by.
Security Type
LP Interest for Limited Partnerships.
Capital Calls
Select Yes to configure this fund for capital calls. Otherwise, select No.
Statements Frequency
Select from Daily, Weekly, Monthly, Quarterly, Semi-Annually, Annually, and Other.
Registration Status
33 Act Registration
Select if the fund is registered under the 33 Act.
Exempt from 33 Act Registration
Select if the fund is exempt, then select from RegD:506(B), RegD:506(C), RegS.
External Identifiers
(Optional) Click Add identifers table to provide any supported identifiers.
Identifier Name
Select from ISIN, CUSIP, or Ticker.
ID
Enter the identifier for this fund. Click Add a new Row to include multiple identifiers.
Minimum Investment
Minimum investment amount from a given advisor.
Allow investments below the minimum amount to be accepted
Select to allow an advisor to make below-minimum investments for multiple clients if the total meets the minimum investment.
Description
Description of the fee.
Unit
Select from Amount, Percentage, and Basis Points.
Value
Amount of the fee.
Frequency
How often the fee is charged.
Gross or Net
Select Gross or Net to indicate whether the performance fee is based on gross or net revenue.
Hurdle Rate (%)
Minimum rate of return required.
Highwater Mark
Net asset value (NAV) level required.
Highwater Mark Frequency
Frequency at which the highwater mark is adjusted.
Description
Description of the fee.
Unit
Select from Amount, Percentage, and Basis Points.
Value
Amount of the fee.
Frequency
How often the fee is charged.
Sales Process
Select Contingent or Non-Contingent.
Offering Start Date
Select the date on which this offering will be available.
Offering End Date
Select the date on which availability will end.
Minimum Amount
(Optional) Enter minimum investment.
Maximum Amount
Enter maximum investment.


For SCorp, CCorp, Ltd., and Trusts, Offering Terms has the following subsections:
Use the following table to complete this section:
Name
Legal name of the security being offered.
Short Name
Alternate name that the security is known by.
Security Type
Equity is the selection for funds that are not LP or LLC funds.
Registration Status
33 Act Registration
Select if the fund is registered under the 33 Act.
Exempt from 33 Act Registration
Select if the fund is exempt, then select from RegD:506(B), RegD:506(C), RegS.
Price Type
At NAV (Prior Period)
Select to base on NAV of prior period.
At NAV (Next Period)
Select to base on NAV of next period.
Closing Frequency
Select from Daily, Weekly, Monthly, Quarterly, Semi-Annually, Annually, Other.
External Identifiers
(Optional) Click Add identifiers table to provide any supported identifiers.
Identifier Name
Select from ISIN, CUSIP, or Ticker.
ID
Enter the ID for the selected identifier type. Click Add a new row to include multiple identifiers.
Click Save.
Security Settings are part of the Launch New Offering payload.
Use the following table to complete this section:
Name
Name of the share class.
Class ID
Identifier assigned by the platform once the fund is launched.
Frontend
Frontend fee (%) for the share class.
Backend
Backend fee (%) for the share class.
Eligibility
Select from Brokerage, Institutional, Advisory, Other.
Min Investment
Minimum investment ($) for the share class.
Allow investments below the minimum amount to be accepted
Description
(Optional) Supporting text providing details about the share class.
External Identifiers
(Optional) Click Add identifiers table to provide any supported identifiers.
Identifier Name
Select from ISIN, CUSIP, or Ticker.
ID
Enter the ID for the selected identifier type. Click Add a new Row to include multiple identifiers.
Class includes other fees
Select if you want to display a table for additional fees.
Description
Description of fee.
Unit
Select from Amount, Percentage, Basis Points.
Value
Enter the fee.
Frequency
Select from Weekly, Monthly, Quarterly, Semi-Annually, Annually, One-Off, Other.
Click Add Share Class to provide the above information for another share class.
Click Save.
Share Class Information is part of the Launch New Offering payload.
Use the following table to complete this section:
Dividend Option
Select from Mandatory Dividend, Discretionary Dividend, No Dividend.
Percentage
For Mandatory Dividend, enter the percentage of the dividend.
Payment Schedule
For Mandatory Dividend, select from Monthly, Quarterly, Semi-Annually, Annually, On Conversion / Maturity.
Dividend Type
For Mandatory, select from Cumulative, Non-Cumulative.
Click Save.
Dividend Options are part of the Launch New Offering payload.
To add fees:
Click Includes management fee.
Use the following table to define a management fee:
Description
Description of the fee.
Unit
Select from Amount, Percentage, and Basis Points.
Value
Amount of the fee.
Frequency
How often the fee is charged.
To add multiple management fees, click Add a new row.
To add a performance fee, click Includes performance fee.
Use the following table to define a performance fee:
Description
Description of the fee.
Unit
Select from Amount, Percentage, and Basis Points.
Value
Amount of the fee.
Frequency
How often the fee is charged.
To add an additional performance fee, click Add a new row.
To add a fee that does not fall under the category of management or performance, click Includes other fee.
Use the following table to define a custom fee type:
Description
Description of the fee.
Unit
Select from Amount, Percentage, and Basis Points.
Value
Amount of the fee.
Frequency
How often the fee is charged.
To add an additional custom fee, click Add a new row.
Click Save when all fees are defined.
Fee Information is part of the Launch New Offering payload.
Use the following table to complete this section:
Sales Process
Select from Non-Contingent, Continuous.
Offering Start Date
Select the date on which the offering will start.
Offering End Date
For Non-Contingent, select the date on which the offering will end.
Maximum Amount
Enter the maximum investment.
Click Save.
Sale Information is part of the Launch New Offering payload.
For LLC funds, Offering Terms has the following subsections:
Use the following table to complete this section:
Click Save.
Security Settings are part of the payload.
Use the following table to complete this section:
Click Add Unit/Share Class to provide the above information for another share class.
Click Save.
Unit/Share Class Information is part of the payload.
Use the following table to complete this section:
Click Save.
Dividend Options are part of the payload.
To add fees:
Click Includes management fee.
Use the following table to define a management fee:
To add multiple management fees, click Add a new row.
To add a performance fee, click Includes performance fee.
Use the following table to define a performance fee:
To add an additional performance fee, click Add a new row.
To add a fee that does not fall under the category of management or performance, click Includes other fee.
Use the following table to define a custom fee type:
To add an additional custom fee, click Add a new row.
Click Save when all fees are defined.
Fee Information part of the payload.
Use the following table to complete this section:
Click Save.
Sale Information is part of the payload.
Name
Legal name of the security being offered.
Short Name
Alternate name that the security is known by.
Security Type
LLC Unit Shares for Limited Liability Companies.
Registration Status
33 Act Registration
Select if the fund is registered under the 33 Act.
Exempt from 33 Act Registration
Select if the fund is exempt, then select from RegD:506(B), RegD:506(C), RegS.
Price Type
At NAV (Prior Period)
Select to base on NAV of prior period.
At NAV (Next Period)
Select to base on NAV of next period.
Closing Frequency
Select from Daily, Weekly, Monthly, Quarterly, Semi-Annually, Annually, Other.
External Identifiers
(Optional) Click Add identifiers table to provide any supported identifiers.
Identifier Name
Select from ISIN, CUSIP, or Ticker.
ID
Enter the ID for the selected identifier type. Click Add a new Row to include multiple identifiers.
Name
Name of the share class.
Class ID
Share class ID generated by the platform when the security is issued. Display only.
Frontend
Frontend fee (%) for the share class.
Backend
Backend fee (%) for the share class.
Eligibility
Select from Brokerage, Institutional, Advisory, Other.
Min Investment
Minimum investment for the share class.
Allow investments below the minimum amount to be accepted
Description
(Optional) Supporting text providing details about the share class.
External Identifiers
(Optional) Click Add identifiers table to provide any supported identifiers.
Identifier Name
Select from ISIN, CUSIP, or Ticker.
ID
Enter the ID for the selected identifier type. Click Add a new Row to include multiple identifiers.
Class includes other fees
Select if you want to display a table for additional fees.
Description
Description of fee.
Unit
Select from Amount, Percentage, Basis Points.
Value
Enter the fee.
Frequency
Select from Weekly, Monthly, Quarterly, Semi-Annually, Annually, One-Off, Other.
Dividend Option
Select from Mandatory Dividend, Discretionary Dividend, No Dividend.
Percentage
For Mandatory Dividend, enter the percentage of the dividend.
Payment Schedule
For Mandatory Dividend, select from Monthly, Quarterly, Semi-Annually, Annually, On Conversion / Maturity.
Dividend Type
For Mandatory, select from Cumulative, Non-Cumulative.
Description
Description of the fee.
Value
Amount of the fee.
Unit
Select from Amount, Percentage, and Basis Points.
Frequency
How often the fee is charged.
Description
Description of the fee.
Unit
Select from Amount, Percentage, and Basis Points.
Value
Amount of the fee.
Frequency
How often the fee is charged.
Description
Description of the fee.
Unit
Select from Amount, Percentage, and Basis Points.
Value
Amount of the fee.
Frequency
How often the fee is charged.
Sales Process
Select from Non-Contingent, Continuous.
Offering Start Date
Select the date on which the offering will start.
Offering End Date
For Non-Contingent, select the date on which the offering will end.
Maximum Amount
Enter the maximum investment.


The Fund Information section has the following subsections:
Use the following table to complete this section:
Name
Full legal name of the fund.
Designate the offering as a Money Market Fund
Select only for funds used as sweep vehicles for model portfolios.
Fund Type
Select from Hedge Fund, Private Equity, Venture Capital, Real Estate, Fund Of Funds, Other.
Strategy
Select from Managed Futures, Liquid Alternatives, Long/Short, Global Macro, Distressed Assets, Fixed Income, Special Financing, Other, Buyout, Credit, Growth Capital, Real Estate, Special Situations, Early Stage, Growth, Late Stage, Single Asset, REIT, Diversified, Hedge Funds, Private Equity, Venture.
Tax Reporting
Select from 1099, K-1, Other.
Short Description
Brief text about the fund.
Click Save.
Fund Profile information is part of the Launch New Offering payload.
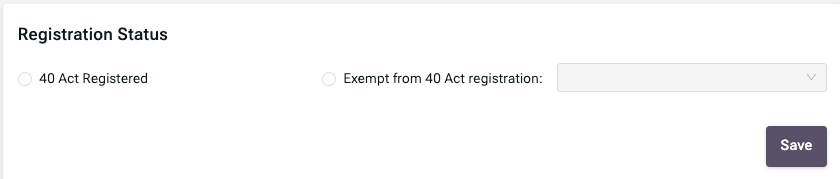
Use the following table to complete this section.
40 Act Registered
Select if the fund is registered under the 40 Act.
Exempt from 40 Act registration
Select if the fund is not registered under the 40 Act, then select the appropriate exemption: 3(C)(1), 3(C)(7), Registered Fund, REIT, For QEP, Other.
Click Save.
Fund Registration Status is part of the Launch New Offering payload.


Use the User Profile page for the following tasks:
changing personal information
name
primary location
changing authentication information
email address
mobile phone number
password
2FA setting
setting primary contact information
viewing your login history
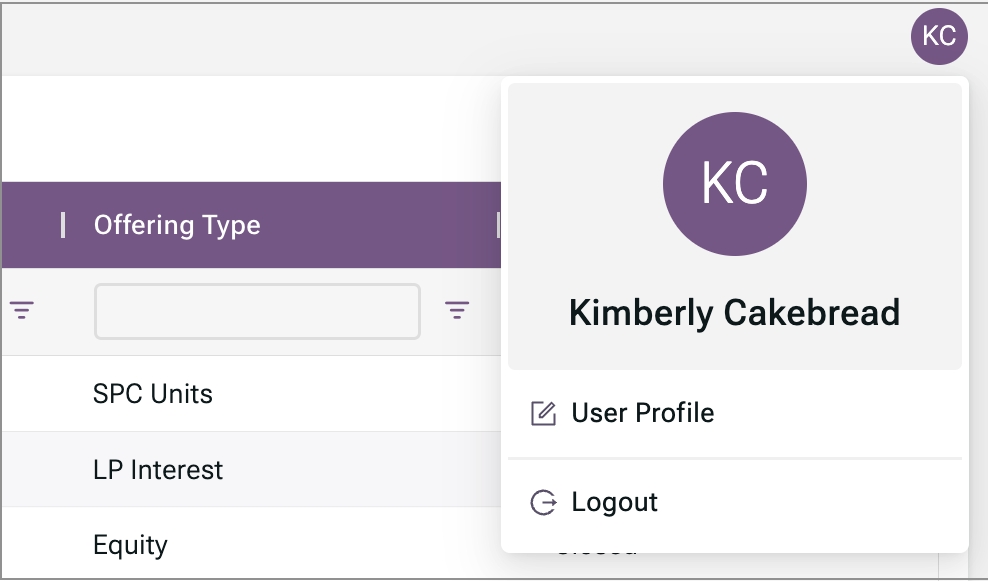
To view your user profile:
Click the profile icon in the upper right corner.
Select User Profile from the dropdown menu.
Personal information includes your name and primary employment location. To make changes:
Click Edit in the Personal Information section of your user profile.
Make necessary changes.
Click Save.
Authentication information includes your email address, mobile phone number, password, and two-step authentication settings.
Click the Edit link in the Primary Contact Information section.
Make changes.
Enter your password to confirm the action.
Click Confirm.
Click the Change Password link.
Enter your old password.
Enter your new password.
Confirm your new password.
Click Confirm.
Click the Change link in the Mobile Phone Number section.
Enter your mobile phone number.
Enter your password to confirm the action.
Click Confirm.
To enable 2-step authentication:
Make sure the correct number is displayed under Mobile Phone Number.
Click the Turn On 2-Step Authentication link.
Enter your password to confirm the action.
Click Confirm.
Enter the code sent to your mobile phone.
Click Send Code.
To disable 2-step authentication:
Click the Turn Off 2-Step Authentication link.
Enter your password to confirm the action.
Click Confirm.
Enter the code sent to your mobile phone.
Click Send Code.
To set or change primary contact information:
Click the Change link in the Primary Contact Information section.
Make changes.
Click Save.
Scroll to the bottom of the page to view login history.


Use the Fund List to search for a share class correlation ID.
In the Other Security IDs field, enter the share class correlation ID you are searching for. The list filters as you type.